
Granite Course
Championship
| Tee | Par | Yardage | Rating | Slope |
|---|---|---|---|---|
| Black | 36 | 3340 | 36.4 | 140 |
Back
| Tee | Par | Yardage | Rating | Slope |
|---|---|---|---|---|
| Blue | 36 | 3084 | 35.4 | 133 |
Forward
| Tee | Par | Yardage | Rating | Slope |
|---|---|---|---|---|
| White (M) | 36 | 2654 | 33.7 | 128 |
| White (W) | 36 | 2654 | 36.4 | 137 |
| Red | 36 | 2372 | 34.6 | 128 |

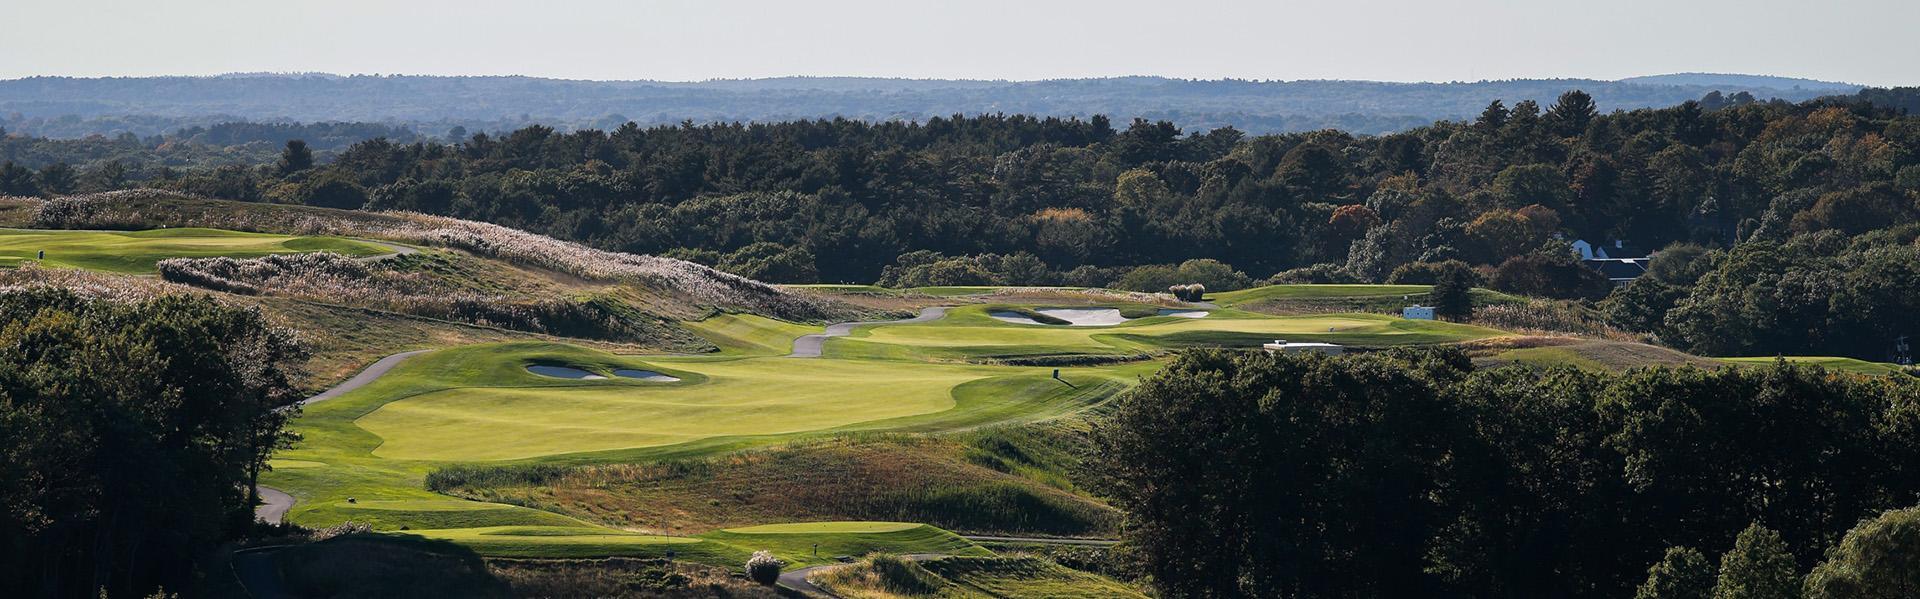
Hole 1: Granite 1
Hole Overview
The opening hole is as scenic as a view can be! This straight away Par 5 offers many options to the golfer. The safest play is to keep your tee shot to the right of the left bunker. Those looking to reach this green in 2 may choose to hit their tee shot over the left bunker to a narrow fairway. The golfer that chooses to go for the green in two will have about 220 yards over a marshy area to the green, the lay-up option requires a second shot that should be hit 120 yards to 150 yards leaving you about 115 yards to the green for your third shot.
Championship
| Tee | Par | Yardage | Handicap |
|---|---|---|---|
| Black | 5 | 513 | 2 |
Back
| Tee | Par | Yardage | Handicap |
|---|---|---|---|
| Blue | 5 | 448 | 2 |
Forward
| Tee | Par | Yardage | Handicap |
|---|---|---|---|
| White (M) | 5 | 453 | 2 |
| White (W) | 5 | 453 | 2 |
| Red | 5 | 436 | 2 |
Hole 2: Granite 2
Hole Overview
A beautiful Par 4 framed by bunkers on both sides of the fairway. This hole is not very long but you must play your second shot from the fairway.
Championship
| Tee | Par | Yardage | Handicap |
|---|---|---|---|
| Black | 4 | 402 | 4 |
Back
| Tee | Par | Yardage | Handicap |
|---|---|---|---|
| Blue | 4 | 375 | 4 |
Forward
| Tee | Par | Yardage | Handicap |
|---|---|---|---|
| White (M) | 4 | 325 | 4 |
| White (W) | 4 | 325 | 4 |
| Red | 4 | 296 | 4 |
Hole 3: Granite 3
Hole Overview
A very generous fairway awaits this tee shot. The key to the hole is making sure your second shot finds the correct tier of the green.
Championship
| Tee | Par | Yardage | Handicap |
|---|---|---|---|
| Black | 4 | 443 | 1 |
Back
| Tee | Par | Yardage | Handicap |
|---|---|---|---|
| Blue | 4 | 399 | 1 |
Forward
| Tee | Par | Yardage | Handicap |
|---|---|---|---|
| White (M) | 4 | 352 | 1 |
| White (W) | 4 | 352 | 1 |
| Red | 4 | 305 | 1 |
Hole 4: Granite 4
Hole Overview
A great Par 3. Your goal on this hole is to avoid the pond on the front left side of the green. Your bail out areas are short right and pin high to the right of the green. A back left pin placement will make this a fun hole to watch.
Championship
| Tee | Par | Yardage | Handicap |
|---|---|---|---|
| Black | 3 | 199 | 9 |
Back
| Tee | Par | Yardage | Handicap |
|---|---|---|---|
| Blue | 3 | 154 | 9 |
Forward
| Tee | Par | Yardage | Handicap |
|---|---|---|---|
| White (M) | 3 | 124 | 9 |
| White (W) | 3 | 124 | 9 |
| Red | 3 | 95 | 9 |
Hole 5: Granite 5
Hole Overview
This hole looks more intimidating than it really is. You want to hit your tee shot just to the right of the rocks in the fairway. From the rock furthest up in the row it is 150 yards to the green. This may not be a driver hole. The green is not very deep and the right side is the preferred bail out.
Championship
| Tee | Par | Yardage | Handicap |
|---|---|---|---|
| Black | 4 | 398 | 6 |
Back
| Tee | Par | Yardage | Handicap |
|---|---|---|---|
| Blue | 4 | 353 | 6 |
Forward
| Tee | Par | Yardage | Handicap |
|---|---|---|---|
| White (M) | 4 | 302 | 6 |
| White (W) | 4 | 302 | 6 |
| Red | 4 | 232 | 6 |
Hole 6: Granite 6
Hole Overview
Even though the yardage says you should try to drive the green that may not be the smartest play. The left side of the hole drops off into a hazard and you will not find your ball. The smart player will hit their drive between the rock formation and the bunker. Due to the fairway which slopes down towards the green this should be a great birdie opportunity.
Championship
| Tee | Par | Yardage | Handicap |
|---|---|---|---|
| Black | 4 | 353 | 8 |
Back
| Tee | Par | Yardage | Handicap |
|---|---|---|---|
| Blue | 4 | 331 | 8 |
Forward
| Tee | Par | Yardage | Handicap |
|---|---|---|---|
| White (M) | 4 | 253 | 8 |
| White (W) | 4 | 253 | 8 |
| Red | 4 | 225 | 8 |
Hole 7: Granite 7
Hole Overview
A very good Par 3 that is all carry to the putting surface. The area behind green offers an amphitheater that allows a great spectator spot.
Championship
| Tee | Par | Yardage | Handicap |
|---|---|---|---|
| Black | 3 | 218 | 7 |
Back
| Tee | Par | Yardage | Handicap |
|---|---|---|---|
| Blue | 3 | 187 | 7 |
Forward
| Tee | Par | Yardage | Handicap |
|---|---|---|---|
| White (M) | 3 | 160 | 7 |
| White (W) | 3 | 160 | 7 |
| Red | 3 | 114 | 7 |
Hole 8: Granite 8
Hole Overview
A good Par 5. The tee shot should be aimed just to the right of the left bunker. The bunker on the left is about 260 yards to carry from the back tee. The second shot should be played just to the left of the right tree line. You do not necessarily want to hit the second shot as far possible, the hole gets narrow as you get closer to the green with hazards on both the right and left side of the green. An approach shot from the left side of the fairway from about 100 yards away is ideal.
Championship
| Tee | Par | Yardage | Handicap |
|---|---|---|---|
| Black | 5 | 504 | 3 |
Back
| Tee | Par | Yardage | Handicap |
|---|---|---|---|
| Blue | 5 | 499 | 3 |
Forward
| Tee | Par | Yardage | Handicap |
|---|---|---|---|
| White (M) | 5 | 407 | 3 |
| White (W) | 5 | 407 | 3 |
| Red | 5 | 401 | 3 |
Hole 9: Granite 9
Hole Overview
A short yet exciting Par 4. The fairway is divided by a row of bunkers in the middle. The fairway on the right is safe but the fairway on the left allows for an option to drive the green.
Championship
| Tee | Par | Yardage | Handicap |
|---|---|---|---|
| Black | 4 | 310 | 5 |
Back
| Tee | Par | Yardage | Handicap |
|---|---|---|---|
| Blue | 4 | 298 | 5 |
Forward
| Tee | Par | Yardage | Handicap |
|---|---|---|---|
| White (M) | 4 | 278 | 5 |
| White (W) | 4 | 278 | 5 |
| Red | 4 | 268 | 5 |
