
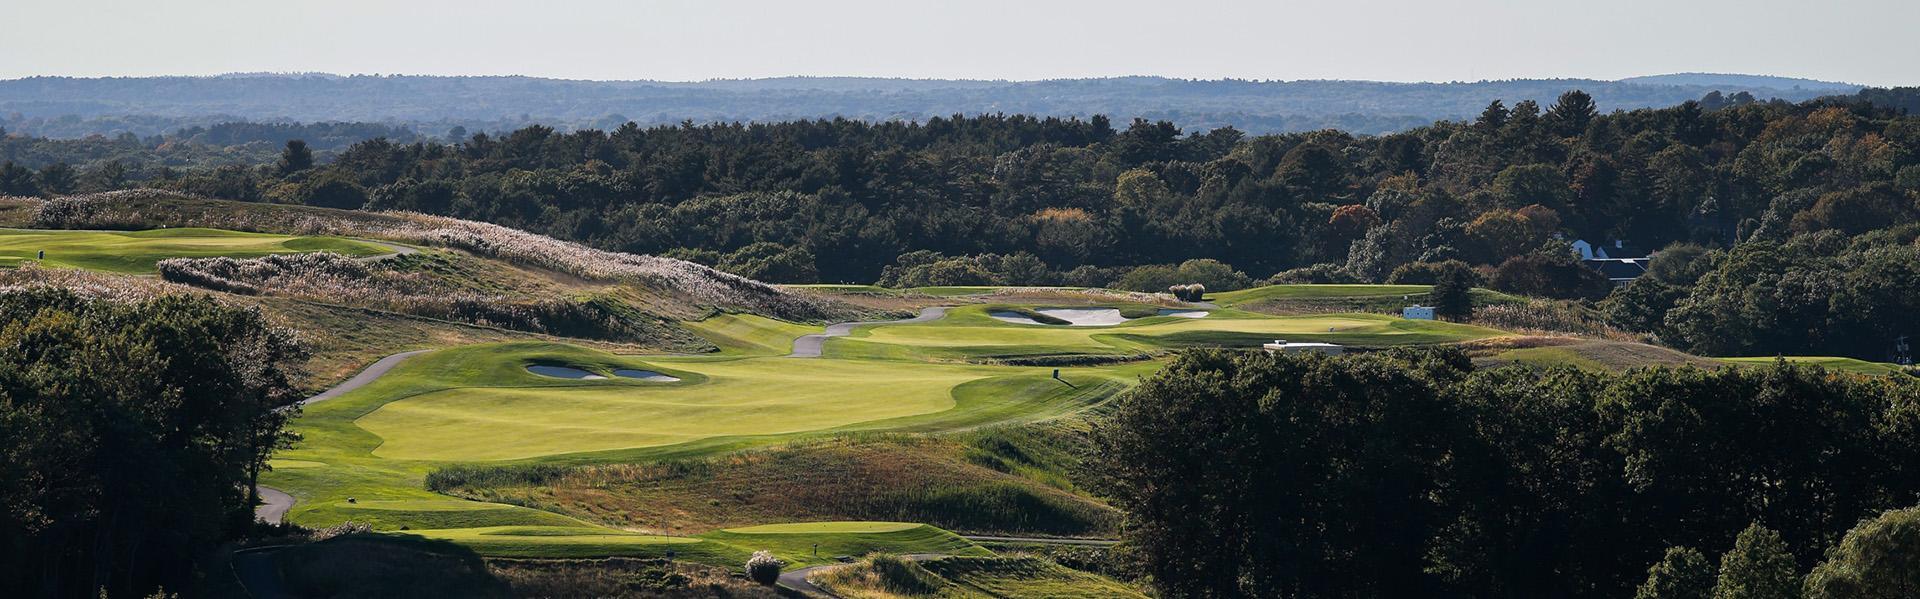
Quincy Course
Championship
| Tee | Par | Yardage | Rating | Slope |
|---|---|---|---|---|
| Black | 35 | 3395 | 36.9 | 134 |
Back
| Tee | Par | Yardage | Rating | Slope |
|---|---|---|---|---|
| Blue | 35 | 3163 | 35.9 | 127 |
Middle
| Tee | Par | Yardage | Rating | Slope |
|---|---|---|---|---|
| White | 35 | 2865 | 34.3 | 123 |
Forward
| Tee | Par | Yardage | Rating | Slope |
|---|---|---|---|---|
| Red | 35 | 2334 | 33.8 | 117 |

Hole 1: Quincy 1
Hole Overview
A solid opening hole. This straightaway Par 5 offers a variety of lengths and many shot options. After navigating your tee shot you will want to favor the left side of the fairway with your second shot. For the long hitters who try to reach in 2 beware of the bunkering that protects this green. Your approach shot will be rewarded if it finds the correct section of the green. Par is a great score!
Championship
| Tee | Par | Yardage | Handicap |
|---|---|---|---|
| Black | 5 | 551 | 1 |
Back
| Tee | Par | Yardage | Handicap |
|---|---|---|---|
| Blue | 5 | 518 | 1 |
Middle
| Tee | Par | Yardage | Handicap |
|---|---|---|---|
| White | 5 | 491 | 1 |
Forward
| Tee | Par | Yardage | Handicap |
|---|---|---|---|
| Red | 5 | 432 | 1 |
Hole 2: Quincy 2
Hole Overview
A wonderfully framed hole. For your best chance, favor the right side of this green.
Championship
| Tee | Par | Yardage | Handicap |
|---|---|---|---|
| Black | 3 | 242 | 5 |
Back
| Tee | Par | Yardage | Handicap |
|---|---|---|---|
| Blue | 3 | 220 | 5 |
Middle
| Tee | Par | Yardage | Handicap |
|---|---|---|---|
| White | 3 | 180 | 5 |
Forward
| Tee | Par | Yardage | Handicap |
|---|---|---|---|
| Red | 3 | 96 | 5 |
Hole 3: Quincy 3
Hole Overview
A challenging shorter Par 5. After your tee shot lands in the generous fairway, the fun begins. The longer hitter can try and hit to the approach just short of the green while others will have to choose to favor either the upper or lower fairway. On your approach shot, be careful of the false front on the green.
Championship
| Tee | Par | Yardage | Handicap |
|---|---|---|---|
| Black | 5 | 515 | 6 |
Back
| Tee | Par | Yardage | Handicap |
|---|---|---|---|
| Blue | 5 | 481 | 6 |
Middle
| Tee | Par | Yardage | Handicap |
|---|---|---|---|
| White | 5 | 434 | 6 |
Forward
| Tee | Par | Yardage | Handicap |
|---|---|---|---|
| Red | 5 | 367 | 6 |
Hole 4: Quincy 4
Hole Overview
The longest Par 4 on property plays both downhill and usually downwind. When standing on the Championship tee box you are at the highest point on the golf course. A tee shot down the left side of the fairway will tend to use the slope better and run a little further. The green sits well below the fairway causing the approach shot to play about 2 clubs less than usual. The green is long from front to back. A two-putt will do you proud.
Championship
| Tee | Par | Yardage | Handicap |
|---|---|---|---|
| Black | 4 | 499 | 2 |
Back
| Tee | Par | Yardage | Handicap |
|---|---|---|---|
| Blue | 4 | 489 | 2 |
Middle
| Tee | Par | Yardage | Handicap |
|---|---|---|---|
| White | 4 | 430 | 2 |
Forward
| Tee | Par | Yardage | Handicap |
|---|---|---|---|
| Red | 4 | 356 | 2 |
Hole 5: Quincy 5
Hole Overview
While the distance on the card reads Par 4, this arguably could have been a par 5 as all approach shots play uphill and into the prevailing wind! Keep your tee shot just to the right of the left fairway bunker. Hitting your second shot to the right side of the fairway will give you your best opportunity for a birdie.
Championship
| Tee | Par | Yardage | Handicap |
|---|---|---|---|
| Black | 4 | 474 | 3 |
Back
| Tee | Par | Yardage | Handicap |
|---|---|---|---|
| Blue | 4 | 439 | 3 |
Middle
| Tee | Par | Yardage | Handicap |
|---|---|---|---|
| White | 4 | 410 | 3 |
Forward
| Tee | Par | Yardage | Handicap |
|---|---|---|---|
| Red | 4 | 370 | 3 |
Hole 6: Quincy 6
Hole Overview
An attractive medium length Par 3, avoid the bunker in front and a Par or Birdie should be in your future. This hole will play about 1 club shorter.
Championship
| Tee | Par | Yardage | Handicap |
|---|---|---|---|
| Black | 3 | 163 | 9 |
Back
| Tee | Par | Yardage | Handicap |
|---|---|---|---|
| Blue | 3 | 140 | 9 |
Middle
| Tee | Par | Yardage | Handicap |
|---|---|---|---|
| White | 3 | 116 | 9 |
Forward
| Tee | Par | Yardage | Handicap |
|---|---|---|---|
| Red | 3 | 88 | 9 |
Hole 7: Quincy 7
Hole Overview
After a few longer holes this is one of the best risk/reward short Par 4’s. The hole is a sharp 90 degree dog leg right. The safe play is a fairway wood or long iron at the bunkers straight away. This will leave you with about 100 yards in. The more daring golfer can choose to try and find the correct line over the fescue on the right and drive the green setting up an eagle chance. When going for the green, beware of the penalties short, right and long of the green. A fun hole that should yield you a good result.
Championship
| Tee | Par | Yardage | Handicap |
|---|---|---|---|
| Black | 4 | 327 | 8 |
Back
| Tee | Par | Yardage | Handicap |
|---|---|---|---|
| Blue | 4 | 296 | 8 |
Middle
| Tee | Par | Yardage | Handicap |
|---|---|---|---|
| White | 4 | 277 | 8 |
Forward
| Tee | Par | Yardage | Handicap |
|---|---|---|---|
| Red | 4 | 220 | 8 |
Hole 8: Quincy 8
Hole Overview
On this Par 3 make sure you do not get caught looking at the beautiful Blue Hills too long as this tee shot requires all of your attention. This hole has the biggest green complex on property and hopefully you will be able to take advantage of that.
Championship
| Tee | Par | Yardage | Handicap |
|---|---|---|---|
| Black | 3 | 239 | 4 |
Back
| Tee | Par | Yardage | Handicap |
|---|---|---|---|
| Blue | 3 | 220 | 4 |
Middle
| Tee | Par | Yardage | Handicap |
|---|---|---|---|
| White | 3 | 182 | 4 |
Forward
| Tee | Par | Yardage | Handicap |
|---|---|---|---|
| Red | 3 | 120 | 4 |
Hole 9: Quincy 9
Hole Overview
A medium length finishing hole. Most golfers will hit their tee shot just to the right of the left bunker, while longer hitters will hit over the left fairway bunker. When hitting your mid to short iron into this green, pay close attention to the pin placement. Hitting your approach to the correct tier will leave a great birdie opportunity while hitting to a different tier will leave you happy to two-putt.
Championship
| Tee | Par | Yardage | Handicap |
|---|---|---|---|
| Black | 4 | 385 | 7 |
Back
| Tee | Par | Yardage | Handicap |
|---|---|---|---|
| Blue | 4 | 360 | 7 |
Middle
| Tee | Par | Yardage | Handicap |
|---|---|---|---|
| White | 4 | 345 | 7 |
Forward
| Tee | Par | Yardage | Handicap |
|---|---|---|---|
| Red | 4 | 285 | 7 |
